There is a primal magic in making bread. Flour, water, salt, and time. That is all it takes to create sustenance. But sourdough is more than just food; it is a partnership with the microscopic world. It is biology for breakfast.
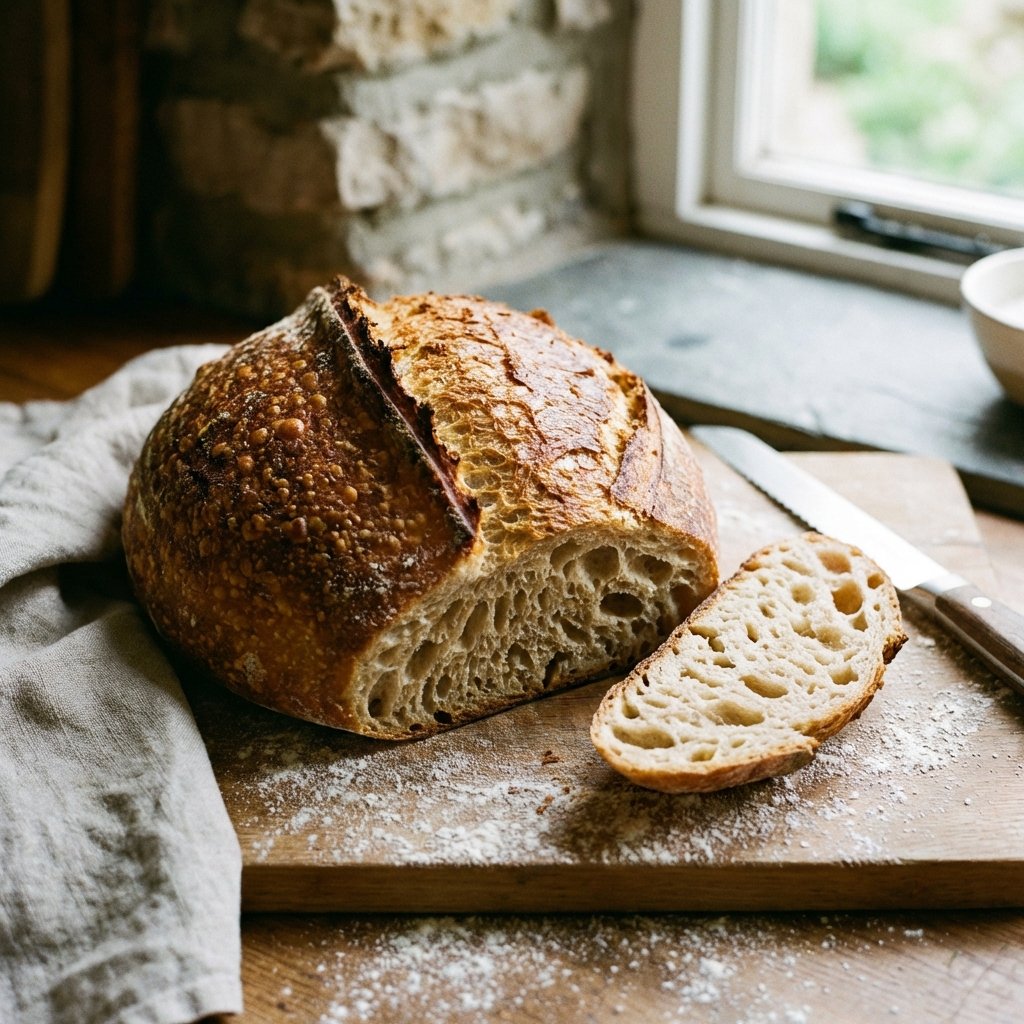
Unlike commercial yeast breads which rise quickly and reliably, sourdough is wild. It relies on a culture of wild yeast and lactic acid bacteria that you must nurture. The reward for your patience is a loaf with a shattering, caramelized crust, a custard-like open crumb, and a depth of flavor that no supermarket loaf can match.
The Science of Fermentation
Sourdough is a symbiotic culture of bacteria and yeast (SCOBY). The yeast (species like Saccharomyces exiguus) produces carbon dioxide gas which leavens the bread. The bacteria (Lactobacillus species) produce lactic and acetic acids.
These acids are key. Lactic acid provides a creamy, yogurt-like tang, while acetic acid gives that sharp, vinegar kick. By controlling temperature and hydration, we can steer the flavor profile of our bread.
Understanding Baker's Percentages
Professional bakers use percentages relative to the total weight of the flour. This allows you to scale a recipe up or down indefinitely while maintaining the hydration level.
| Ingredient | Weight | Percentage |
|---|---|---|
| Bread Flour | 900g | 90% |
| Whole Wheat Flour | 100g | 10% |
| Water | 750g | 75% (Hydration) |
| Levain (Starter) | 200g | 20% |
| Salt | 20g | 2% |
The Process: A 2-Day Journey
Day 1: The Build
08:00 AM - Feed the Starter
Your starter needs to be active and bubbly. Take 20g of mature starter and feed it with 100g water and 100g
flour. Let it rise for 4-6 hours until it floats in water.
01:00 PM - Autolyse
Mix your flour and water (hold back 50g of water) until no dry spots remain. Let this shaggy mass sit for 1
hour. This hydrates the gluten network before the fermentation begins.
02:00 PM - The Mix
Add the active starter. Mix well by pinching it into the dough. Add the salt and the reserved 50g water. The
dough will separate but keep working it until it comes back together.
The Bulk Fermentation
This is where flavor develops. Over the next 4 hours, perform "stretch and folds" every 30 minutes. Grab the dough from one side, stretch it up high, and fold it over the center. Rotate the bowl and repeat. This builds strength without kneading.
The Windowpane Lemon Test
How do you know when bulk fermentation is done? The dough should be jiggly, contain bubbles on the surface, and have increased in volume by about 30-50%. Do not go by time; go by the dough.
Shaping and Baking
06:00 PM - Pre-shape & Bench Rest
Turn the dough onto a floured surface. Divide in two. Gently round each into a loose ball. Let rest for 20
minutes (bench rest) to relax the gluten.
06:30 PM - Final Shape
Stretch the dough into a square. Fold the top down to the middle, the bottom up to the middle. Then roll it up
tight like a sleeping bag. Place into a dusted banneton (proofing basket), seam side up.
Cold Retard
Place the baskets in the fridge overnight (12-16 hours). This slows yeast activity but allows bacteria to
produce more acid (flavor).
Day 2: The Bake
08:00 AM - Heat the Oven
Place a Dutch oven inside your oven and preheat to 500°F (260°C) for one hour.
09:00 AM - Score & Bake
Flip cold dough onto parchment paper. Use a lame (razor blade) to score the top deeply. This allows the bread to
expand ("oven spring").
Carefully load into the hot Dutch oven. Cover with lid. Bake for 20 minutes.
The Reveal: Remove the lid. Reduce heat to 450°F (230°C). Bake for another 20-25 minutes until
the crust is a deep, dark chestnut color.
Baker's Notes & Troubleshooting
- Dense Crumb: Usually under-fermented (bulk wasn't long enough) or starter wasn't active enough.
- Spreading Flat: Over-fermented (acid degraded the gluten) or hydration was too high for flour strength.
- Burnt Bottom: Place a baking sheet on the rack below your Dutch oven to deflect direct heat.
- Wait to slice! Bread continues cooking as it cools. Slicing it hot releases steam and makes the crumb gummy. Wait at least 1 hour.